How to use React Refs and React Forward Refs - including hooks


Are you not exactly sure what a React Ref (or Forward Ref) is? Or how to use it in a project? Then this article will explain the basics to you! Let’s start…
Click to reveal the Table of Contents
TABLE OF CONTENTS
REACT REFS
REACT FORWARD REFS
FINAL REMARKS
REACT REFS
Introduction
So what the heck is a ref and why would you want to use one in a React based project anyhow?
Well… if you are at all familiar with React, the typical way to update information from a parent component to its child component, is to pass the information through as a prop. The so called “top-down” approach. This way the child component will be modified (re-rendered) with any new/updated prop data. This is essentially the typical React workflow. However, using refs breaks this flow.

Instead, they allow us to create a reference to the node/element that we have attached the ref to. Once a ref is attached to a node/element, we can access the many properties of it by using the current value. For example, in a class based component where we set the ref to a variable name of inputRef, it would look something like this…
this.inputRef.current
In a way, it is similar to the properties that we can access from…
event.target
Thus having such a ref in your code allows you to modify, update, or control an element without having to re-render the entire child component, which also makes your code/application better performant. Refs can be useful in certain situations such as in the following cases:
- Form validation (Ex: To ensure that the password field criteria is met. Or that no empty fields are submitted.)
- Credit card & phone number formatting
- Working with canvas, audio or video
- Getting the size/position of DOM elements for specific events (Ex: scrolling)
- Triggering animations
- Controlling focus on an element or text selection
- Integrating 3rd party libraries
As you can see, react refs can be used in numerous situations, but one shouldn’t get too carried away with jumping to use them. Using state in the common parent component, in order to pass down the necessary information, is still the preferred way to handle state changes.
One thing that you should note is that you cannot use the ref attribute in functional components, because they don’t have instances. However, you can use the useRef hook instead.
In order for this article to be easier to absorb and reference, it is broken into 2 sections. The first section will cover how to use react refs, in both hooks and class based components, while the second portion will cover their usages for react forward refs. You can jump right to the section you want, by referring to the table of contents.
HOOKS
How to use React Refs - Basic
If you are using a functional component, you can create a ref by using the useRef hook on an element. This can be accomplished by saving the useRef hook to a variable name. An example of this is given below.
const secretRef = useRef();And inside of the element that you want to attach the ref to, we simply add a ref prop to the element and set the variable name to it. In this case, the variable name is secretRef and this can be seen below.
<input ref={secretRef} />Of course this might not make sense without seeing it used in a more complete, but very basic, example.
Let’s create a SecretPage component that will show 2 sentences on the page. The first will say, “Find The Secret Word”. The second says, “The secret word is: ” and is left intentionally blank at the end. In addition, there is also an input box, and a button rendered on the page.
If we type something into the input box, this will be our “secret” code. If we were then to click on the button, it would show us what our secret word was at the end of the second sentence. Visually, this would look like below.
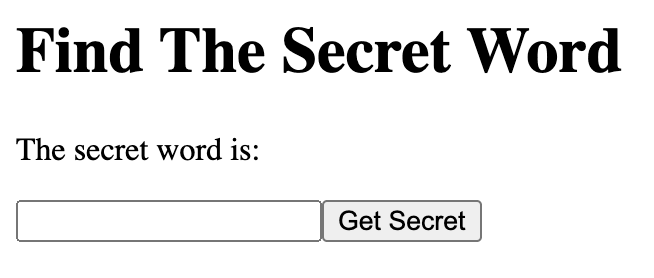
Yes… I know, very creative!!
So besides this being a very, very basic, and simple example, it will show us the concepts of how to use refs in practice.
What would this look like in code? You can see how the SecretPage component would be written below.
const SecretPage = () => {
  const secretRef = useRef();
  const [secret, setSecret] = useState(null);

  const handleClick = () => setSecret(secretRef.current.value);

  return (
    <div>
      <h1>Find The Secret Word</h1>
      <p>The secret word is: {secret} </p>
      <input type="text" ref={secretRef} />
      <button onClick={handleClick}>Get Secret</button>
    </div>
  );
};

export default SecretPage;
Note that this article assumes you already have a basic understanding of React and it will not go over the details on how everything works.
The important thing to recognize here is that in order to get the value out of the input box, we do not have to use event.target.value. Instead, the ref way is to call our ref (which we stored in secretRef) and get the value from the input box that way. This can be accomplished by using the following line of code secretRef.current.value. This will provide us with the text content of the input box.
Overall, you can see that it is pretty basic to use refs and is fairly similar to doing it the normal way with state. But if you did do the same example with state, you’d need to keep track of two states. You might be thinking…
Why two states???
Well… one is for the text that is written into the input box, and this would be handled using an onChange handler. The other one would be for the text that is displayed when the user clicks on the button. To give you a comparison of what this would look like in code, you can see the following state example below.
const SecretPage = () => {
  const [secret, setSecret] = useState(null);
  const [userInput, setUserInput] = useState(null);

  const handleClick = () => setSecret(userInput);
  const handleChange = (event) => setUserInput(event.target.value)

  return (
    <div>
      <h1>Find The Secret Word</h1>
      <p>The secret word is: {secret} </p>
      <input type="text" onChange={handleChange} />
      <button onClick={handleClick}>Get Secret</button>
    </div>
  );
};

export default SecretPage;
Again… pretty basic, but the ref example is actually a little bit less complicated than handling it with state. That is one advantage, and the other is that the component isn’t re-rendering on every update when using refs.
Passing Refs to a child component
Let’s say that instead of having all the code in one component, we want to split it up into 2 components. One would be the input box and the other would be the rest of the SecretPage component. This would mean that our new Input component is now a child component of the SecretPage component.
Confusing?? It will make more sense once we get to the code.
And if we were to continue using the same example from the last section, let’s see what it would look like having to pass down a ref to a functional component (and all without having to use a callback).
Inside the child Input component it would look like the following.
const Input = ({ mySecretRef }) => <input type="text" ref={mySecretRef} />;

export default Input;
Inside the parent SecretPage component, it would now look like this.
const SecretPage = () => {
  const secretRef = useRef();
  const [secret, setSecret] = useState(null);

  const handleClick = () => setSecret(secretRef.current.value);

  return (
    <div>
      <h1>Find The Secret Word</h1>
      <p>The secret word is: {secret} </p>
      <Input type="text" mySecretRef={secretRef} />
      <button onClick={handleClick}>Get Secret</button>
    </div>
  );
};

export default SecretPage;
As you can see, there isn’t much of a difference at all. We are essentially passing the ref into a prop on the Input component, and then consuming this prop inside of the child component. Everything would work the same as before!
CLASS BASED
How to use React Refs - Basic
What would all of this look like if we were using the older way of declaring a ref in a class based component? Let’s find out!
The first thing to remember is that we would now have to use createRef() instead and this would look as follows.
this.secretRef = createRef();

<input ref={this.secretRef} />
Using the same React Ref example as from the Hooks section, the full class based example would look like the following.
class SecretPage extends Component {
  constructor() {
    super();
    this.secretRef = createRef();
    this.state = { secret: null };
  }

  handleClick = (event) => {
    event.preventDefault();
    this.setState({ secret: this.secretRef.current.value });
  };

  render() {
    return (
      <div className="secret">
        <h1>Find The Secret Word</h1>
        <p>The secret word is: {this.state.secret} </p>
        <input type="text" ref={this.secretRef} />
        <button onClick={this.handleClick}>Get Secret</button>
      </div>
    );
  }
}

export default SecretPage;
As you can see, it mostly looks very much the same (if we were to ignore the syntax differences between hooks and class based components). The main takeaway here is that the same concepts are applied.
That we attach a ref to an input element, and store the current ref value into our state when the user clicks on the button. This is exactly the same flow as in the Hooks example.
Passing Refs to the child component
You can also pass a ref from a parent component down into the child component through props. But unlike in the Hooks section, here you do need to use a callback to make it work.
Continuing with the same example as before, inside the child component it would look like this.
const Input = ({ secretRef }) => <input type="text" ref={secretRef} />;

export default Input;
And inside the parent component.
class SecretPage extends Component {
  constructor() {
    super();
    this.state = { secret: null };
  }

  handleClick = (event) => {
    event.preventDefault();
    this.setState({ secret: this.secretRef.value });
  };

  render() {
    return (
      <div className="secret">
        <h1>Find The Secret Word</h1>
        <p>The secret word is: {this.state.secret} </p>
        <Input secretRef={(secretRef) => (this.secretRef = secretRef)} />
        <button onClick={this.handleClick}>Get Secret</button>
      </div>
    );
  }
}

export default SecretPage;
The 2 major takeaways from this situation are that we don’t have to use createRef() and we aren’t getting the value of the input box from current anymore. Instead we are using a callback that sets this.secretRef to secretRef, and this gives us access to the child component’s value.
REACT FORWARD REFS
Introduction
The last part that you can do with React refs is ref forwarding. This is just another way to pass the ref from the parent component down into a child component by making using of the forwardRef() method. This method just wraps the entire child component. It also requires you to split your props and ref into two different variables.
Forward Refs With Hooks
In a similar manner to passing refs to the child component (as we saw in the React Refs section), we can instead wrap the entire child component in a forwardRef and pass the ref through as an argument. This is best explained by the use of an example. We will continue using the one we were using before, but with a few minor code changes.
Inside the child component, we would need to write it like this now.
const Input = forwardRef((_props, ref) => <input type="text" ref={ref} />);

export default Input;
One thing to note here is that we are putting _ infront of the props solely to stop the linter from complaining. This is done to signify that the argument is not being used anywhere in the component.
And inside the parent component it would look like this.
const SecretPage = () => {
  const secretRef = useRef();
  const [secret, setSecret] = useState(null);

  const handleClick = () => setSecret(secretRef.current.value);

  return (
    <div>
      <h1>Find The Secret Word</h1>
      <p>The secret word is: {secret} </p>
      <Input type="text" ref={secretRef} />
      <button onClick={handleClick}>Get Secret</button>
    </div>
  );
};

export default SecretPage;
As you can see, the changes were done solely in the child component. The props and ref are split and this is wrapped in the forwardRef method. Nothing else changes and the functionality remains the same.
Forward Refs With Class Based Components
As we learned in the Hooks section (above), let’s go over what React Forward Refs look like in a class based component. Continuing with our secret page example, the modified code is shown below.
Inside the child component.
const Input = forwardRef((_props, ref) => <input type="text" ref={ref} />);

export default Input;
Hopefully you noticed that this child component looks exactly the exact same as in the Hooks section. If you did, you are correct! No changes here!
And inside the parent component, there are a few differences when comparing it to the class based way of passing down a ref to a child component.
class SecretPage extends Component {
  constructor() {
    super();
    this.secretRef = createRef();
    this.state = { secret: null };
  }

  handleClick = (event) => {
    event.preventDefault();
    this.setState({ secret: this.secretRef.current.value });
  };

  render() {
    return (
      <div className="secret">
        <h1>Find The Secret Word</h1>
        <p>The secret word is: {this.state.secret} </p>
        <Input ref={this.secretRef} />
        <button onClick={this.handleClick}>Get Secret</button>
      </div>
    );
  }
}

export default SecretPage;
The first thing that you’ll notice (hopefully) is that we are defining createRef() again (like we did in the basic example of the refs section) and aren’t using a callback when setting the ref in the Input component.
If you have a stronger attention to detail, you’ll also have noticed that this parent component is almost exactly the same as in the basic ref section, but with one minor difference. Instead of using the input element, we are using the Input component.
FINAL REMARKS
I encourage you to go to CodeSandbox and try to recreate all of these Secret Page examples to see them in action. Try playing around with each one to get a deeper level of understanding to how they work.
And when you do, don’t forget about adding the imports to the top of the file!
If you want to delve a bit deeper into some more React concepts, then my introduction to React useCallback post may also be of interest to you.
Other wise, I hope you proceed with trying to recreate my secret page examples on something like CodeSandbox. This will help you to solidify your knowledge and hopefully get you comfortable enough to use React Refs (or Ref Forwarding) on your next project!
The main thing to remember is that you want to use refs sparingly and try to stick with the React way of handling information that changes on the client side through the use of state. However, if you do come across a situation were it makes sense to use a ref, or want to avoid re-rendering some components, then please keep the following in mind when choosing whether to use refs or ref forwarding.
- You can set refs in any component and consume them on any element within that component.
- Alternatively, you can pass refs down into a child component (when you need to use the ref of the child in the parent component).
- Instead of passing down a ref to a child component, you can also use React’s built in Ref Forwarding method to do the same thing.